Connect to Copicake in Your n8n Workflow

Connect to Copicake in Your n8n Workflow
We're excited to introduce copicake/n8n-nodes-copicake, a custom node package that helps you integrate Copicake with your favorite n8n workflows in just a few clicks.
If you're already building internal tools or automations with n8n, this node makes it super straightforward to connect your Copicake templates, trigger image generations, and pass parameters dynamically. No need to juggle raw HTTP requests anymore.
We built this to scratch our own itch, and now it's open for everyone 🎉
🧩 What this node can do
With this custom node, you can:
- Generate images from any Copicake template using dynamic data
- Seamlessly plug Copicake into larger automation chains (like auto-emailing or scheduled posts)
🛠️ How to get started
Here's a step-by-step guide to get you up and running in no time.
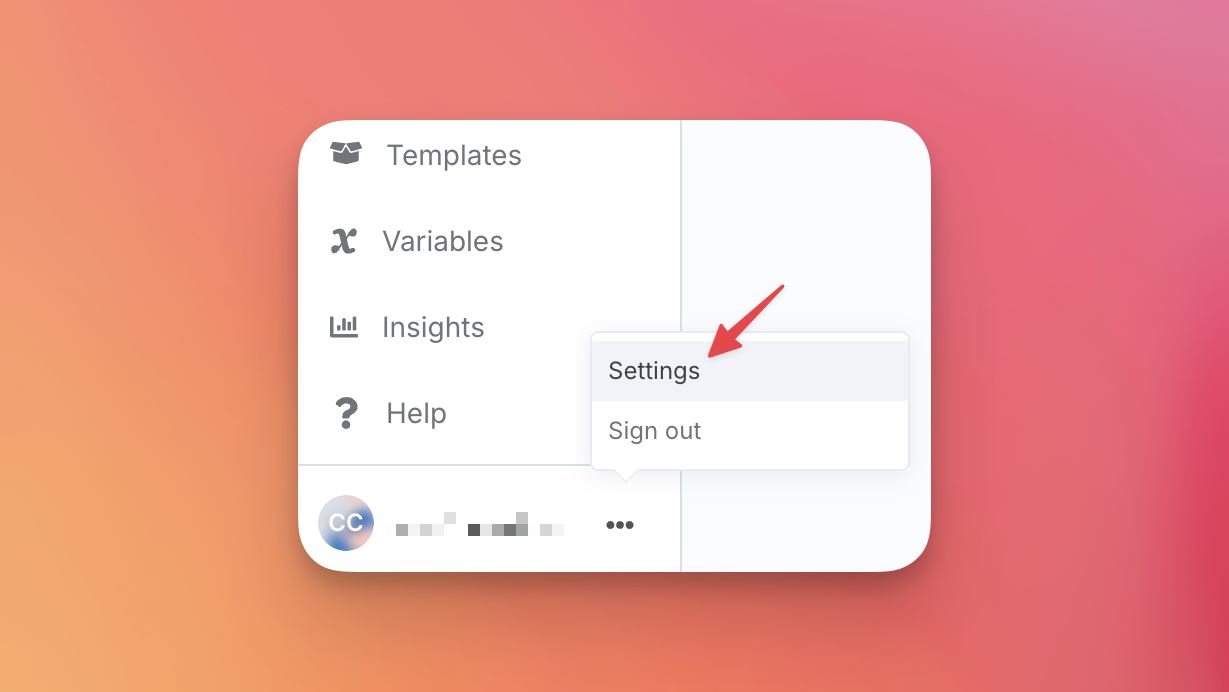
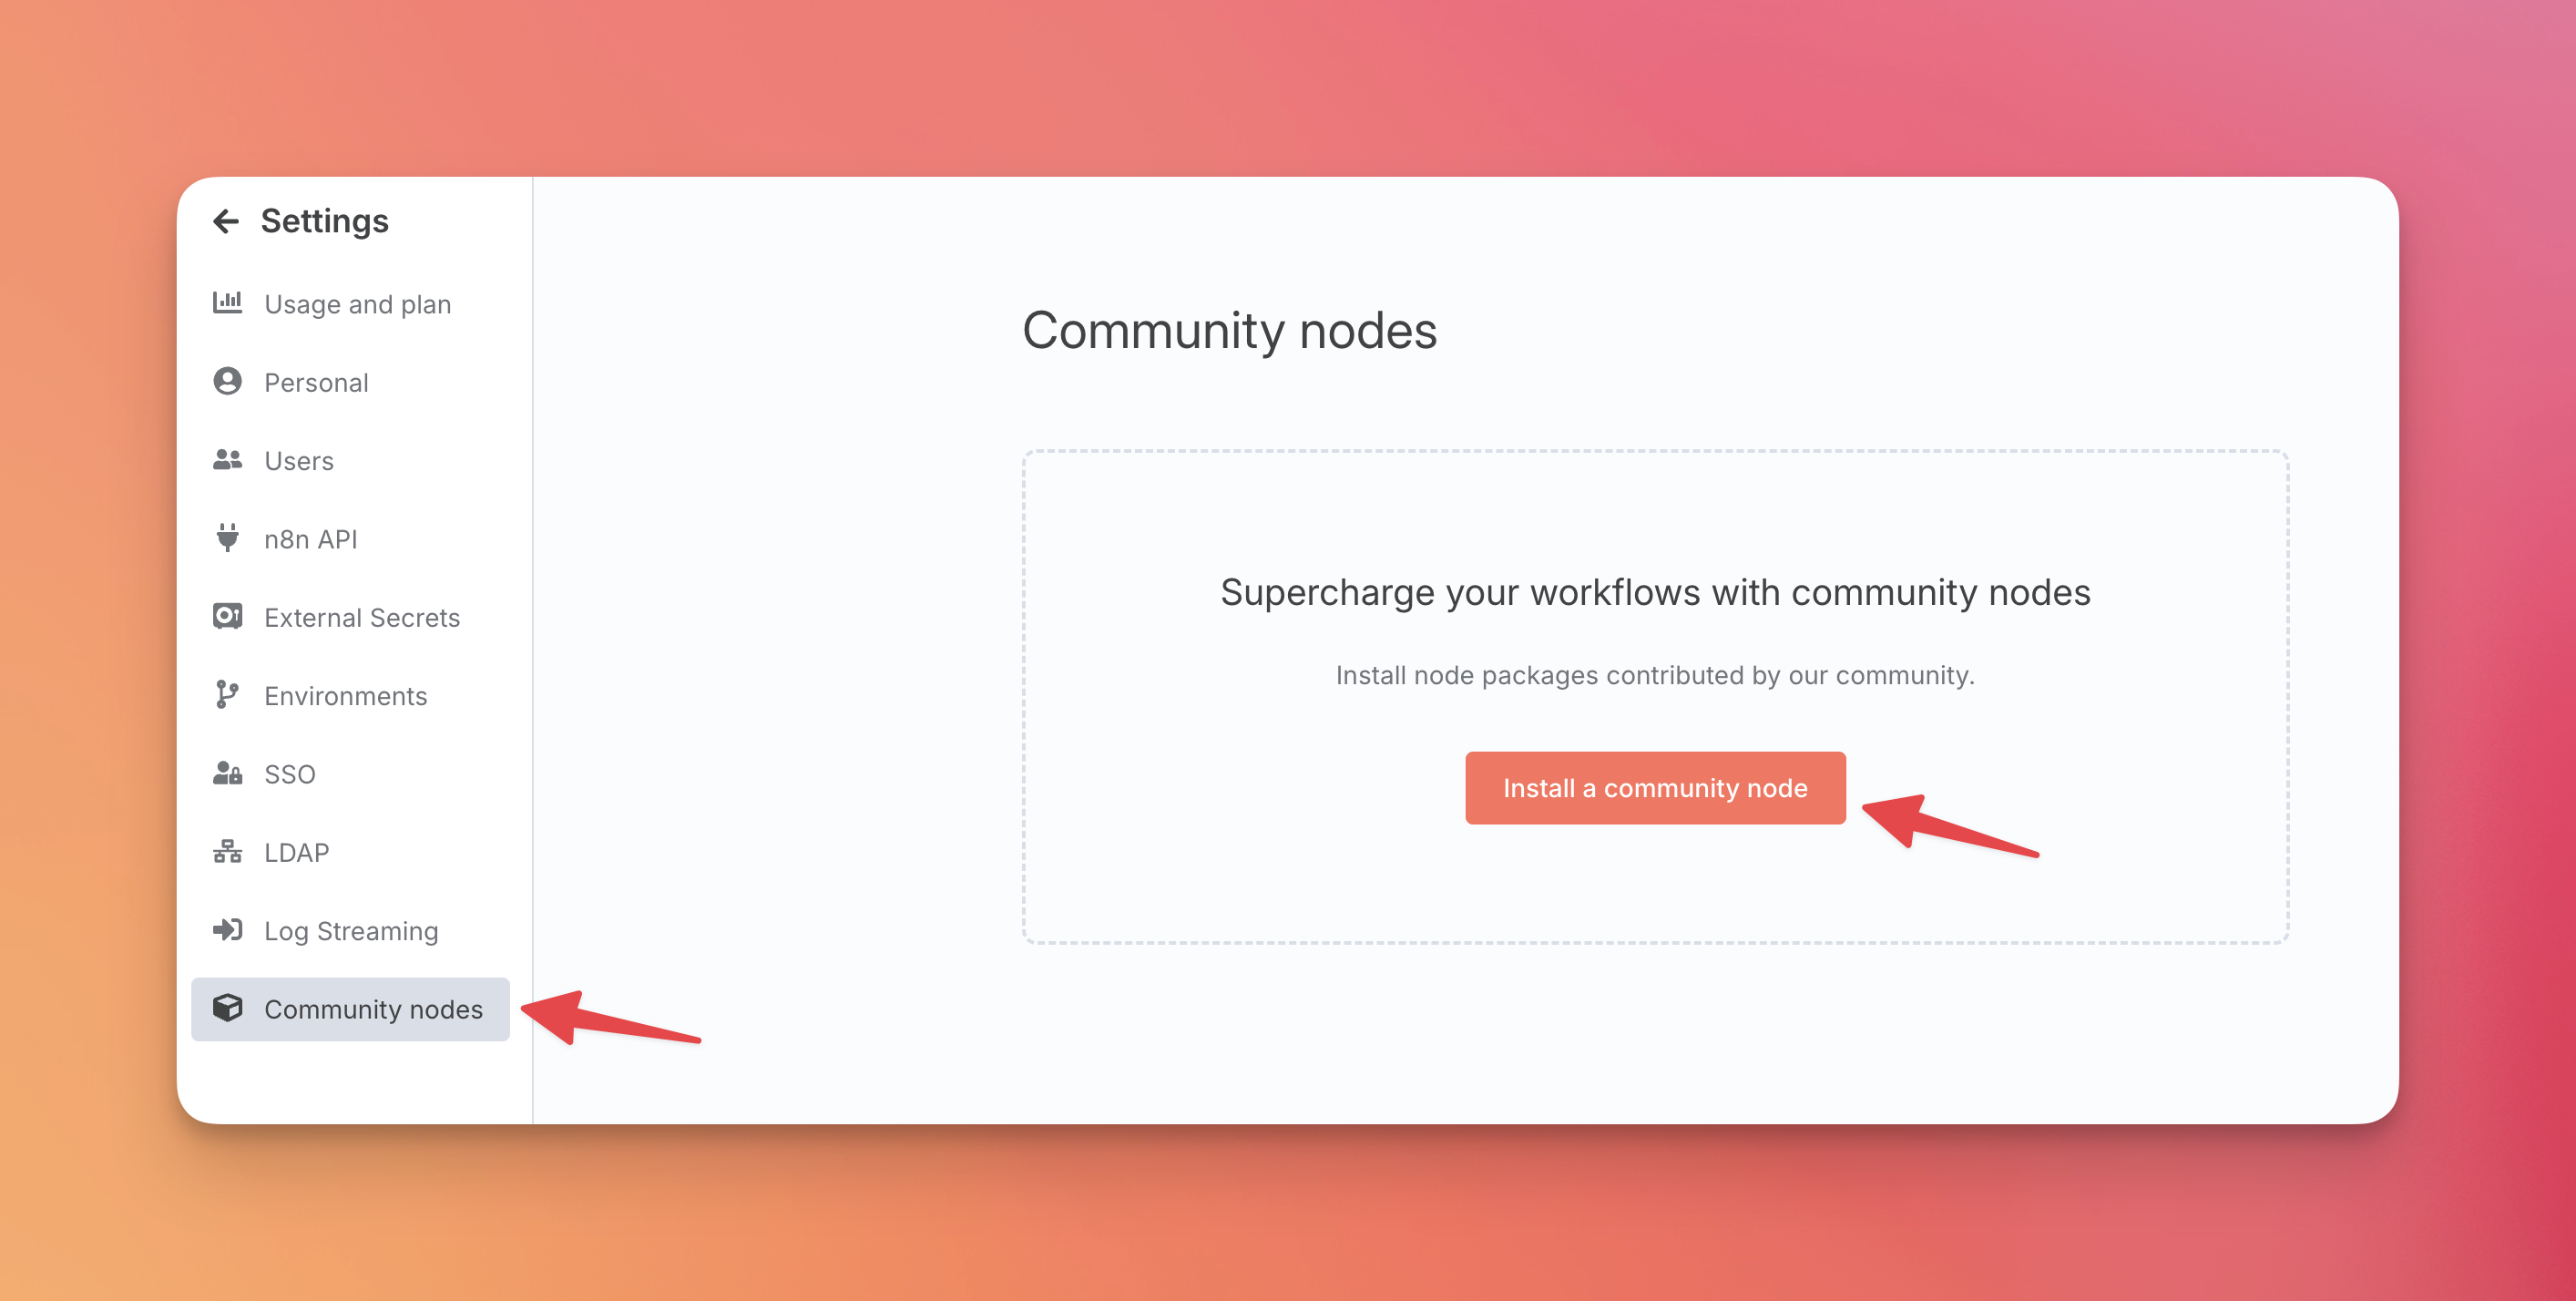
1. Find the Community Nodes settings
In your n8n instance, go to Settings → Community nodes.
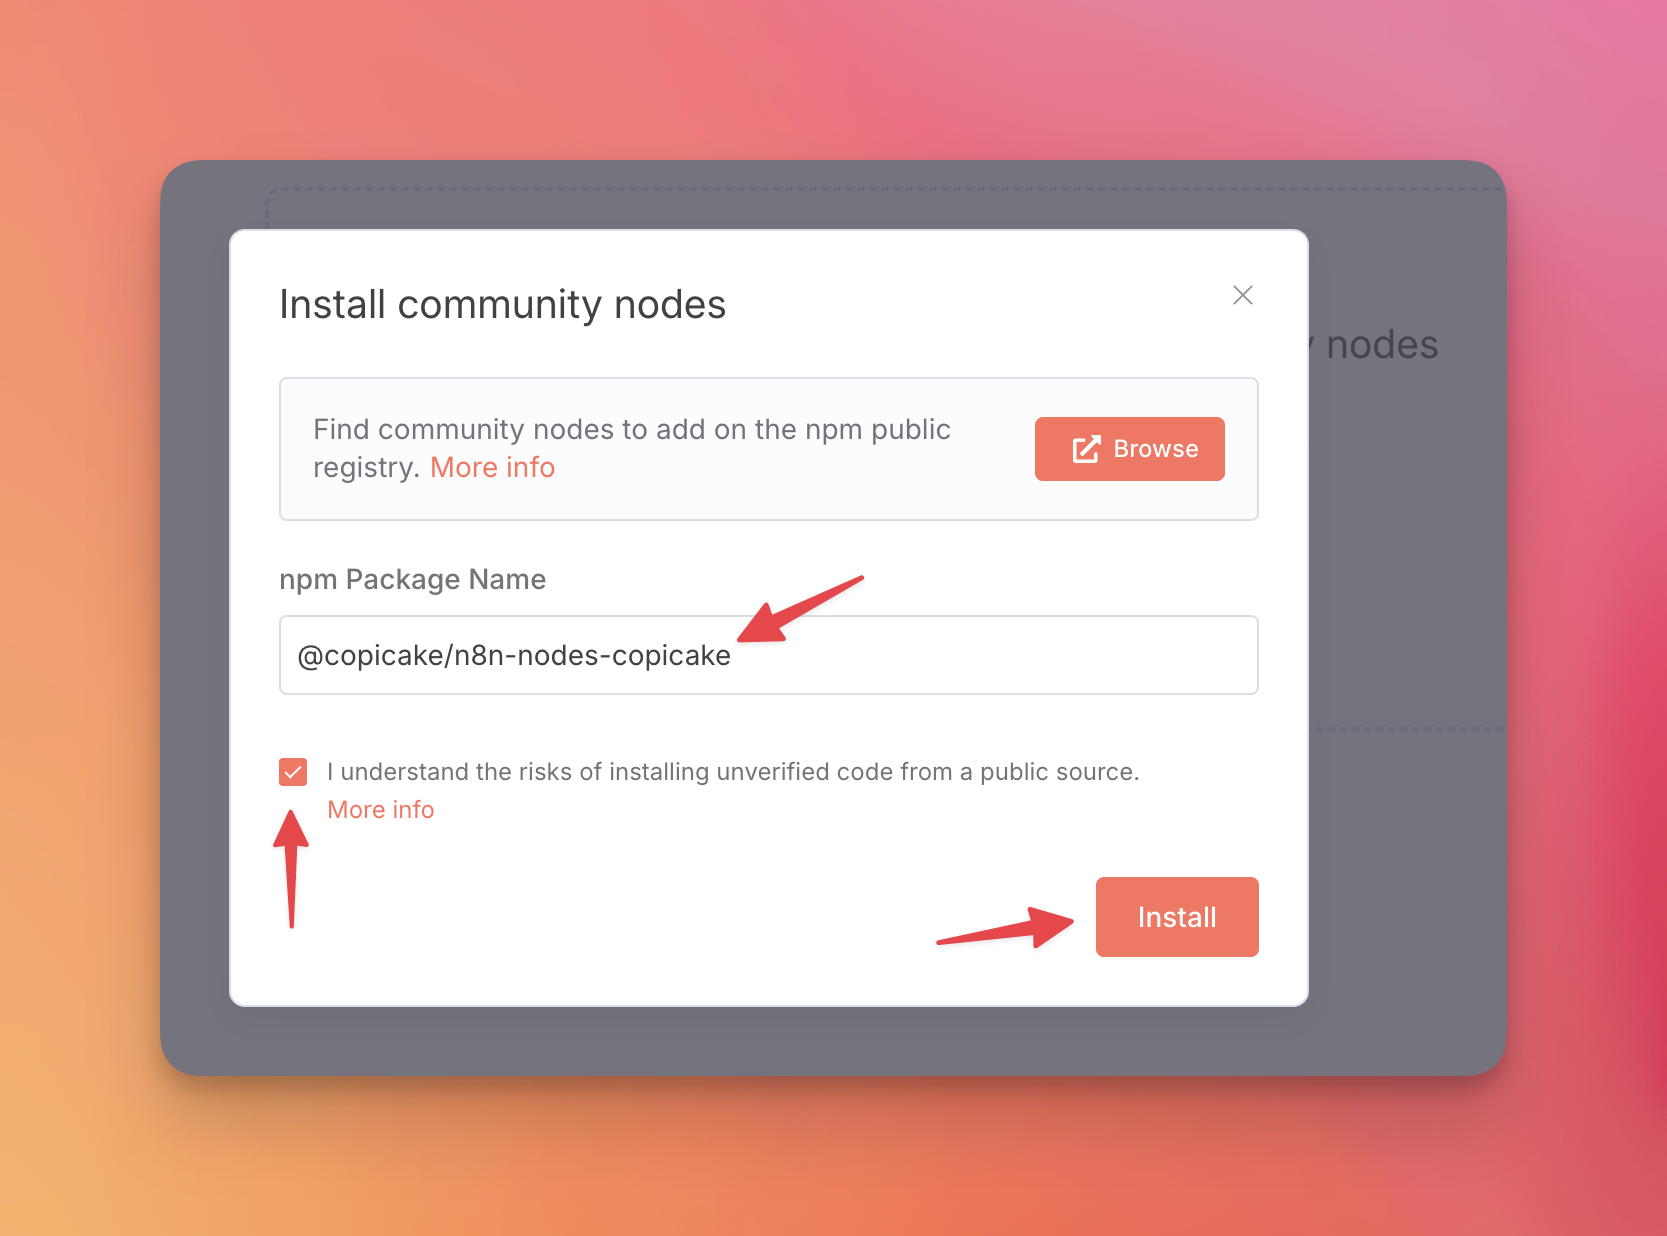
2. Install the Copicake node
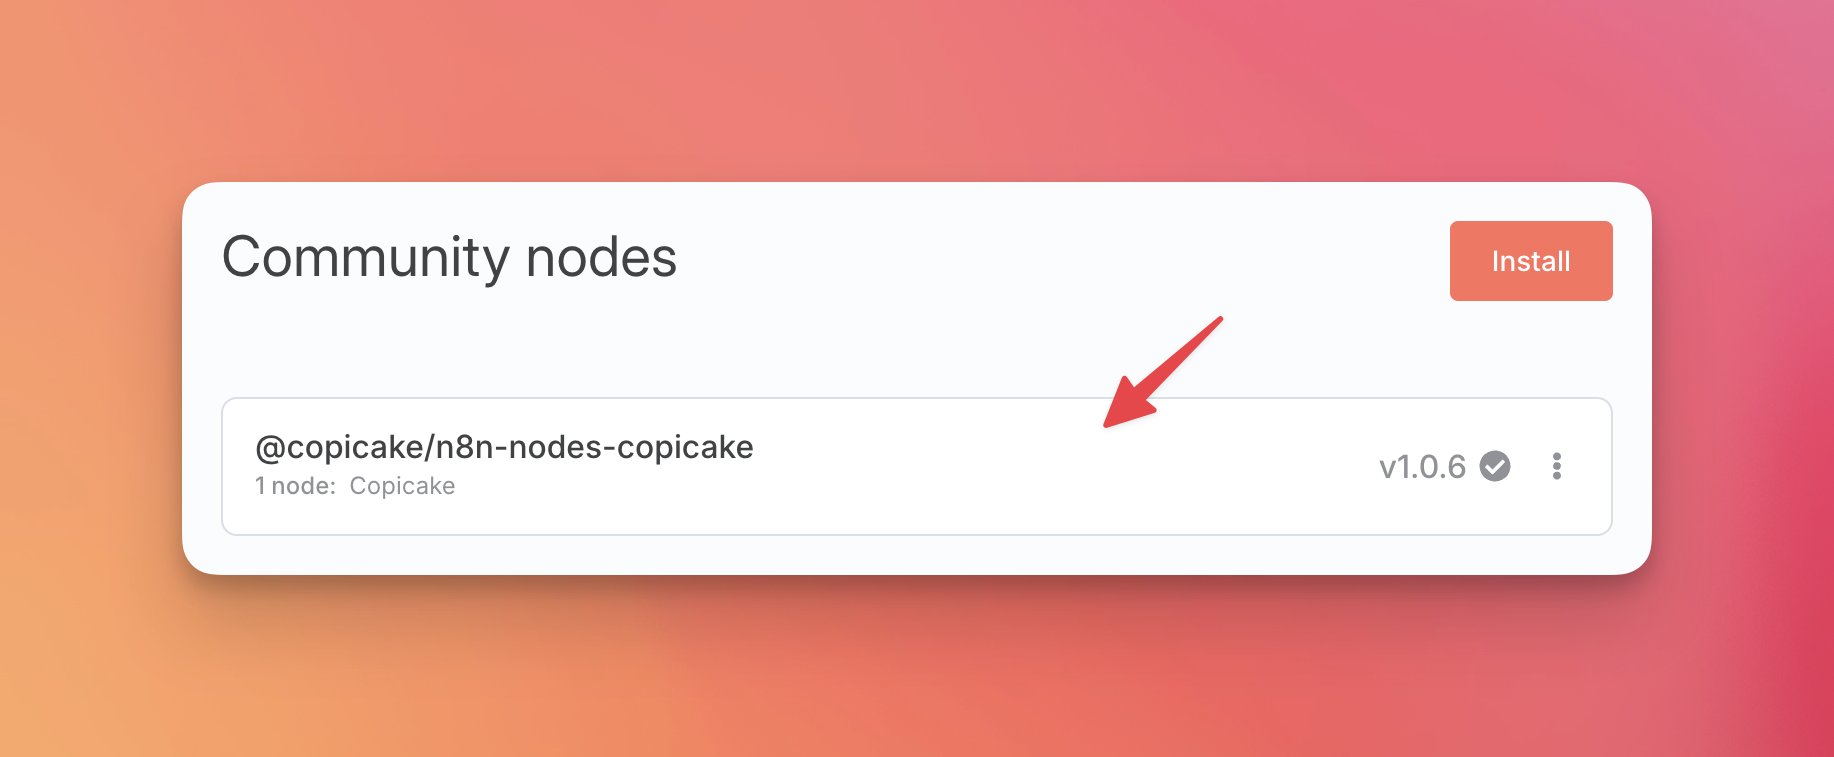
Click Install a community node. In the dialog, enter the npm package name @copicake/n8n-nodes-copicake, check the box, and click Install.
Once installed, you'll see it in your list of community nodes.
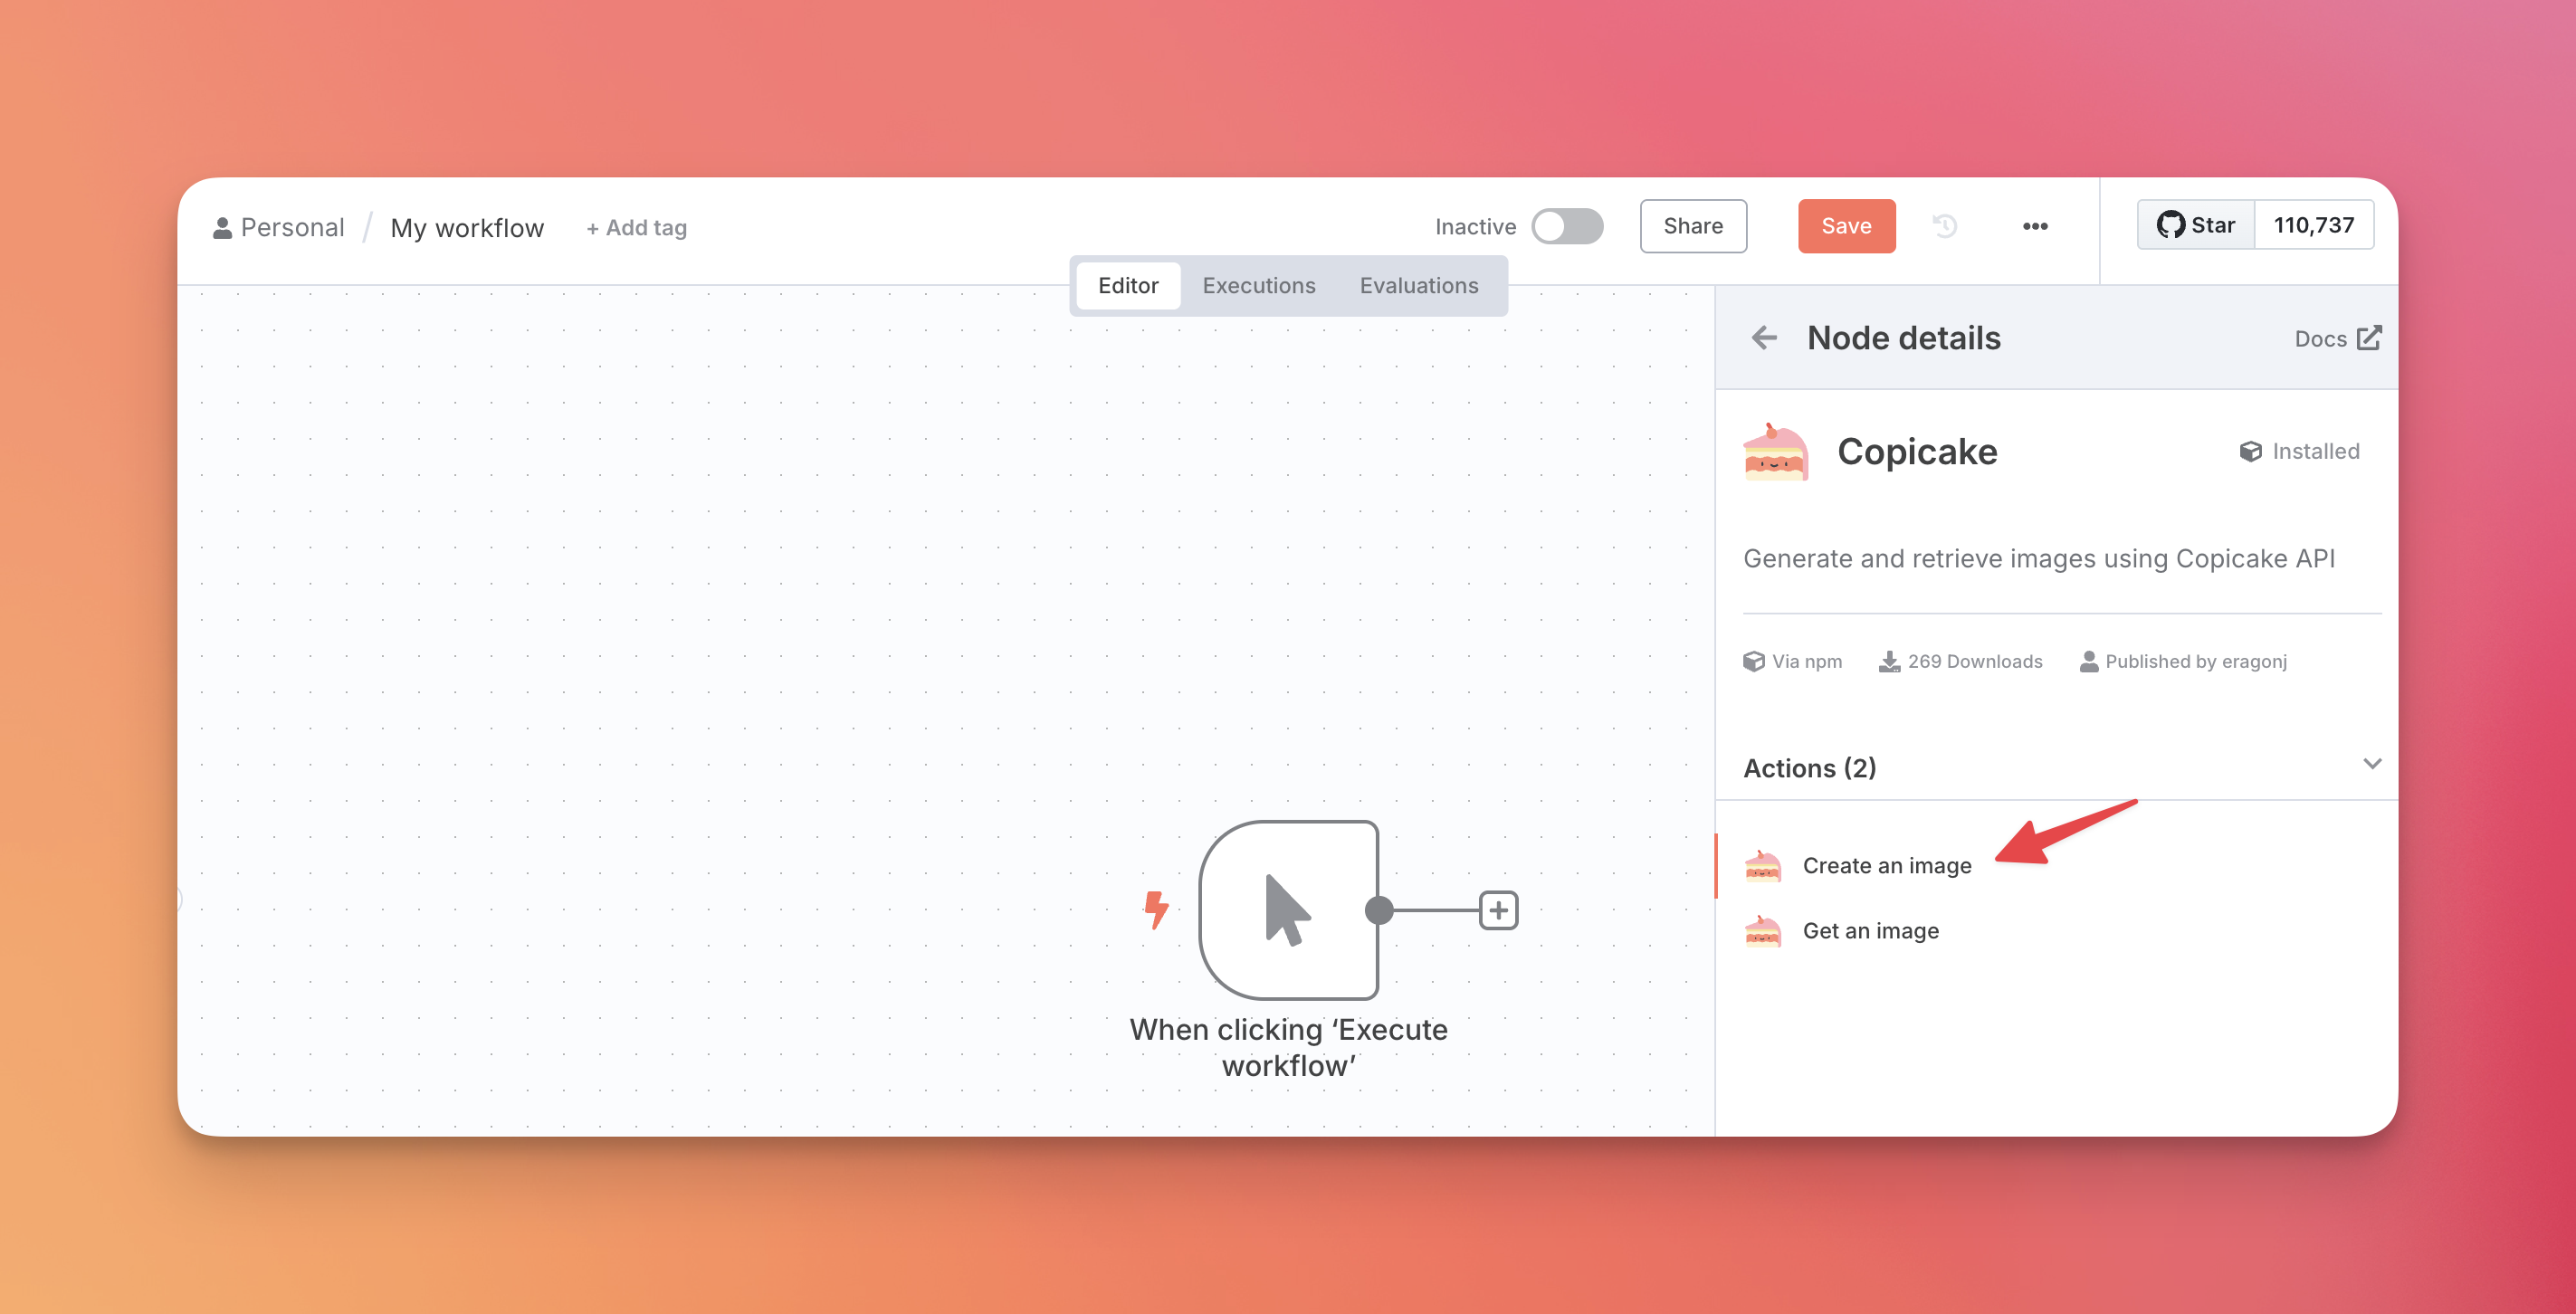
3. Add the Copicake node to your workflow
Go back to your workflow editor, add a new node, and search for Copicake.

4. Configure the node
The Copicake node has two actions: Create an image and Get an image. For this guide, we'll use Create an image.
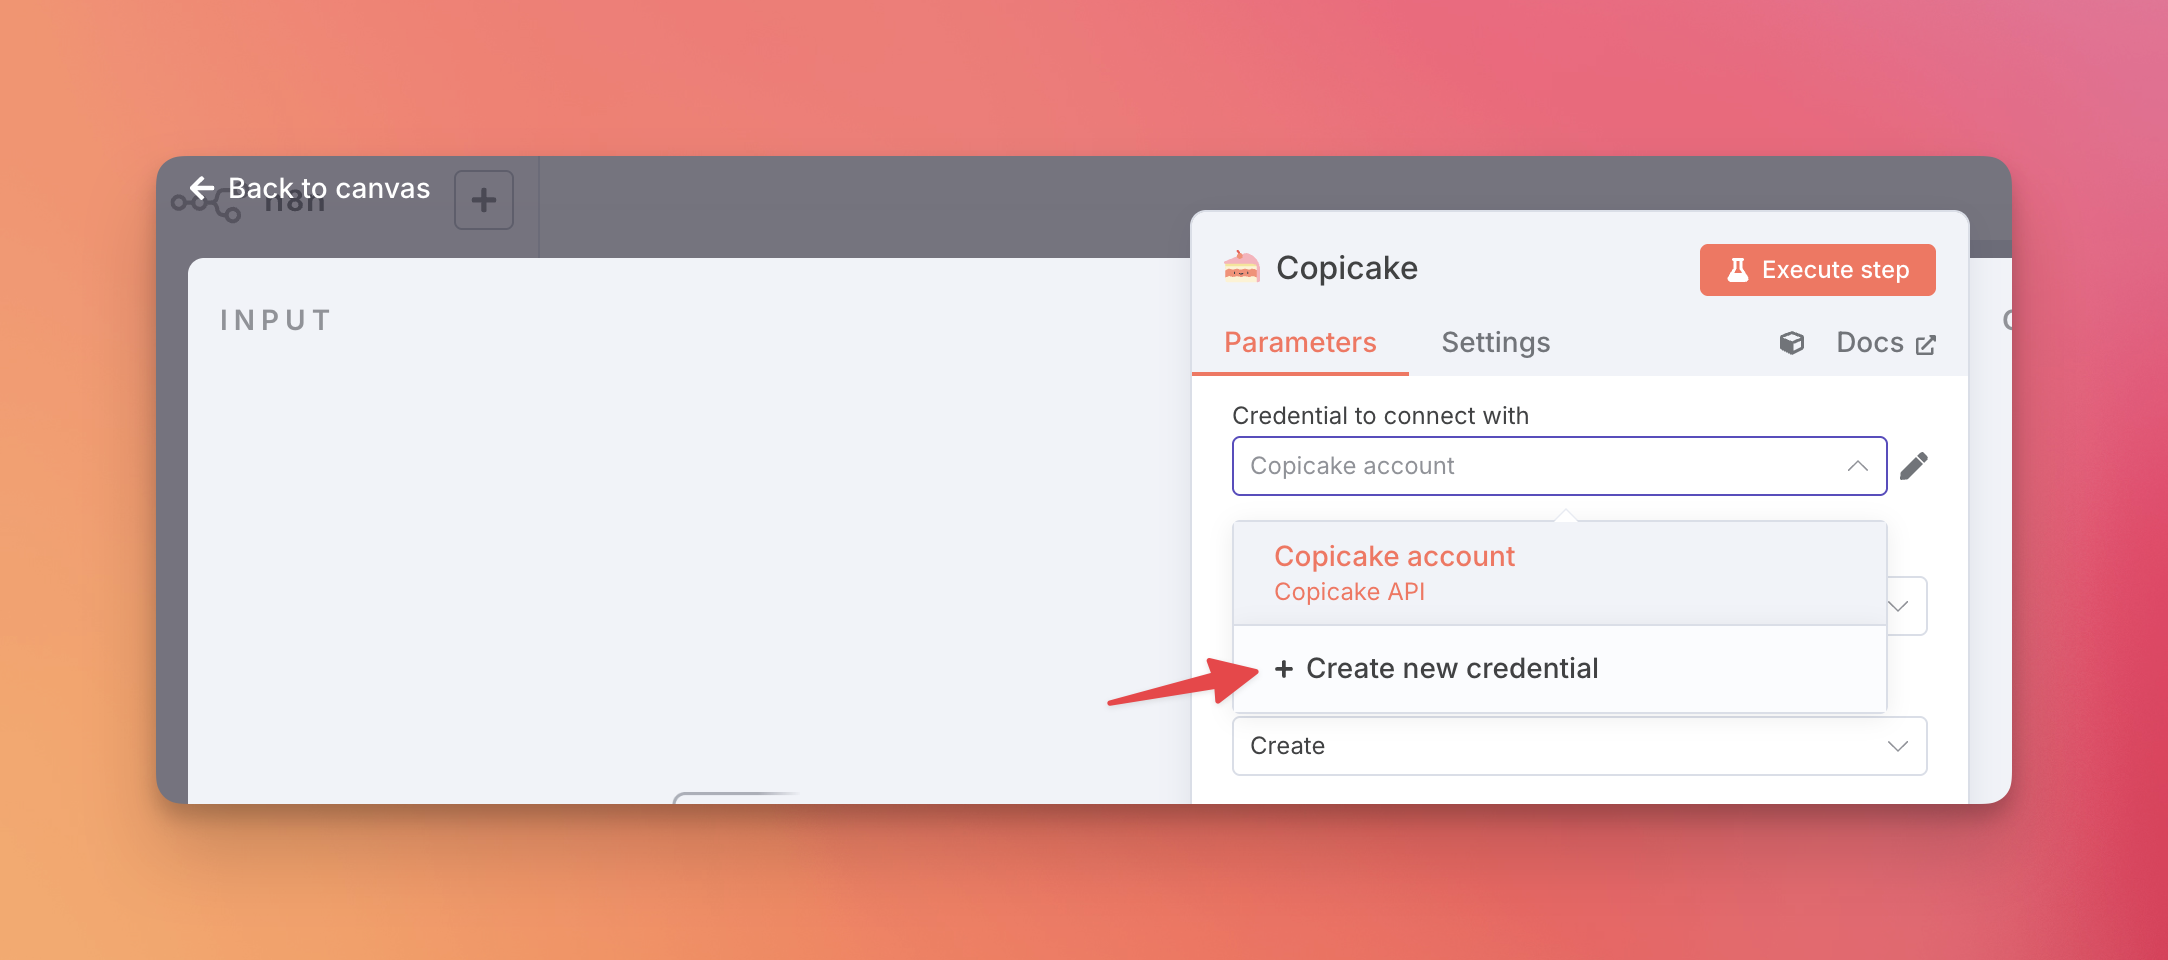
5. Add your Copicake credentials
Before you can use the node, you need to connect your Copicake account. Click on the Credential to connect with dropdown and select Create new credential.
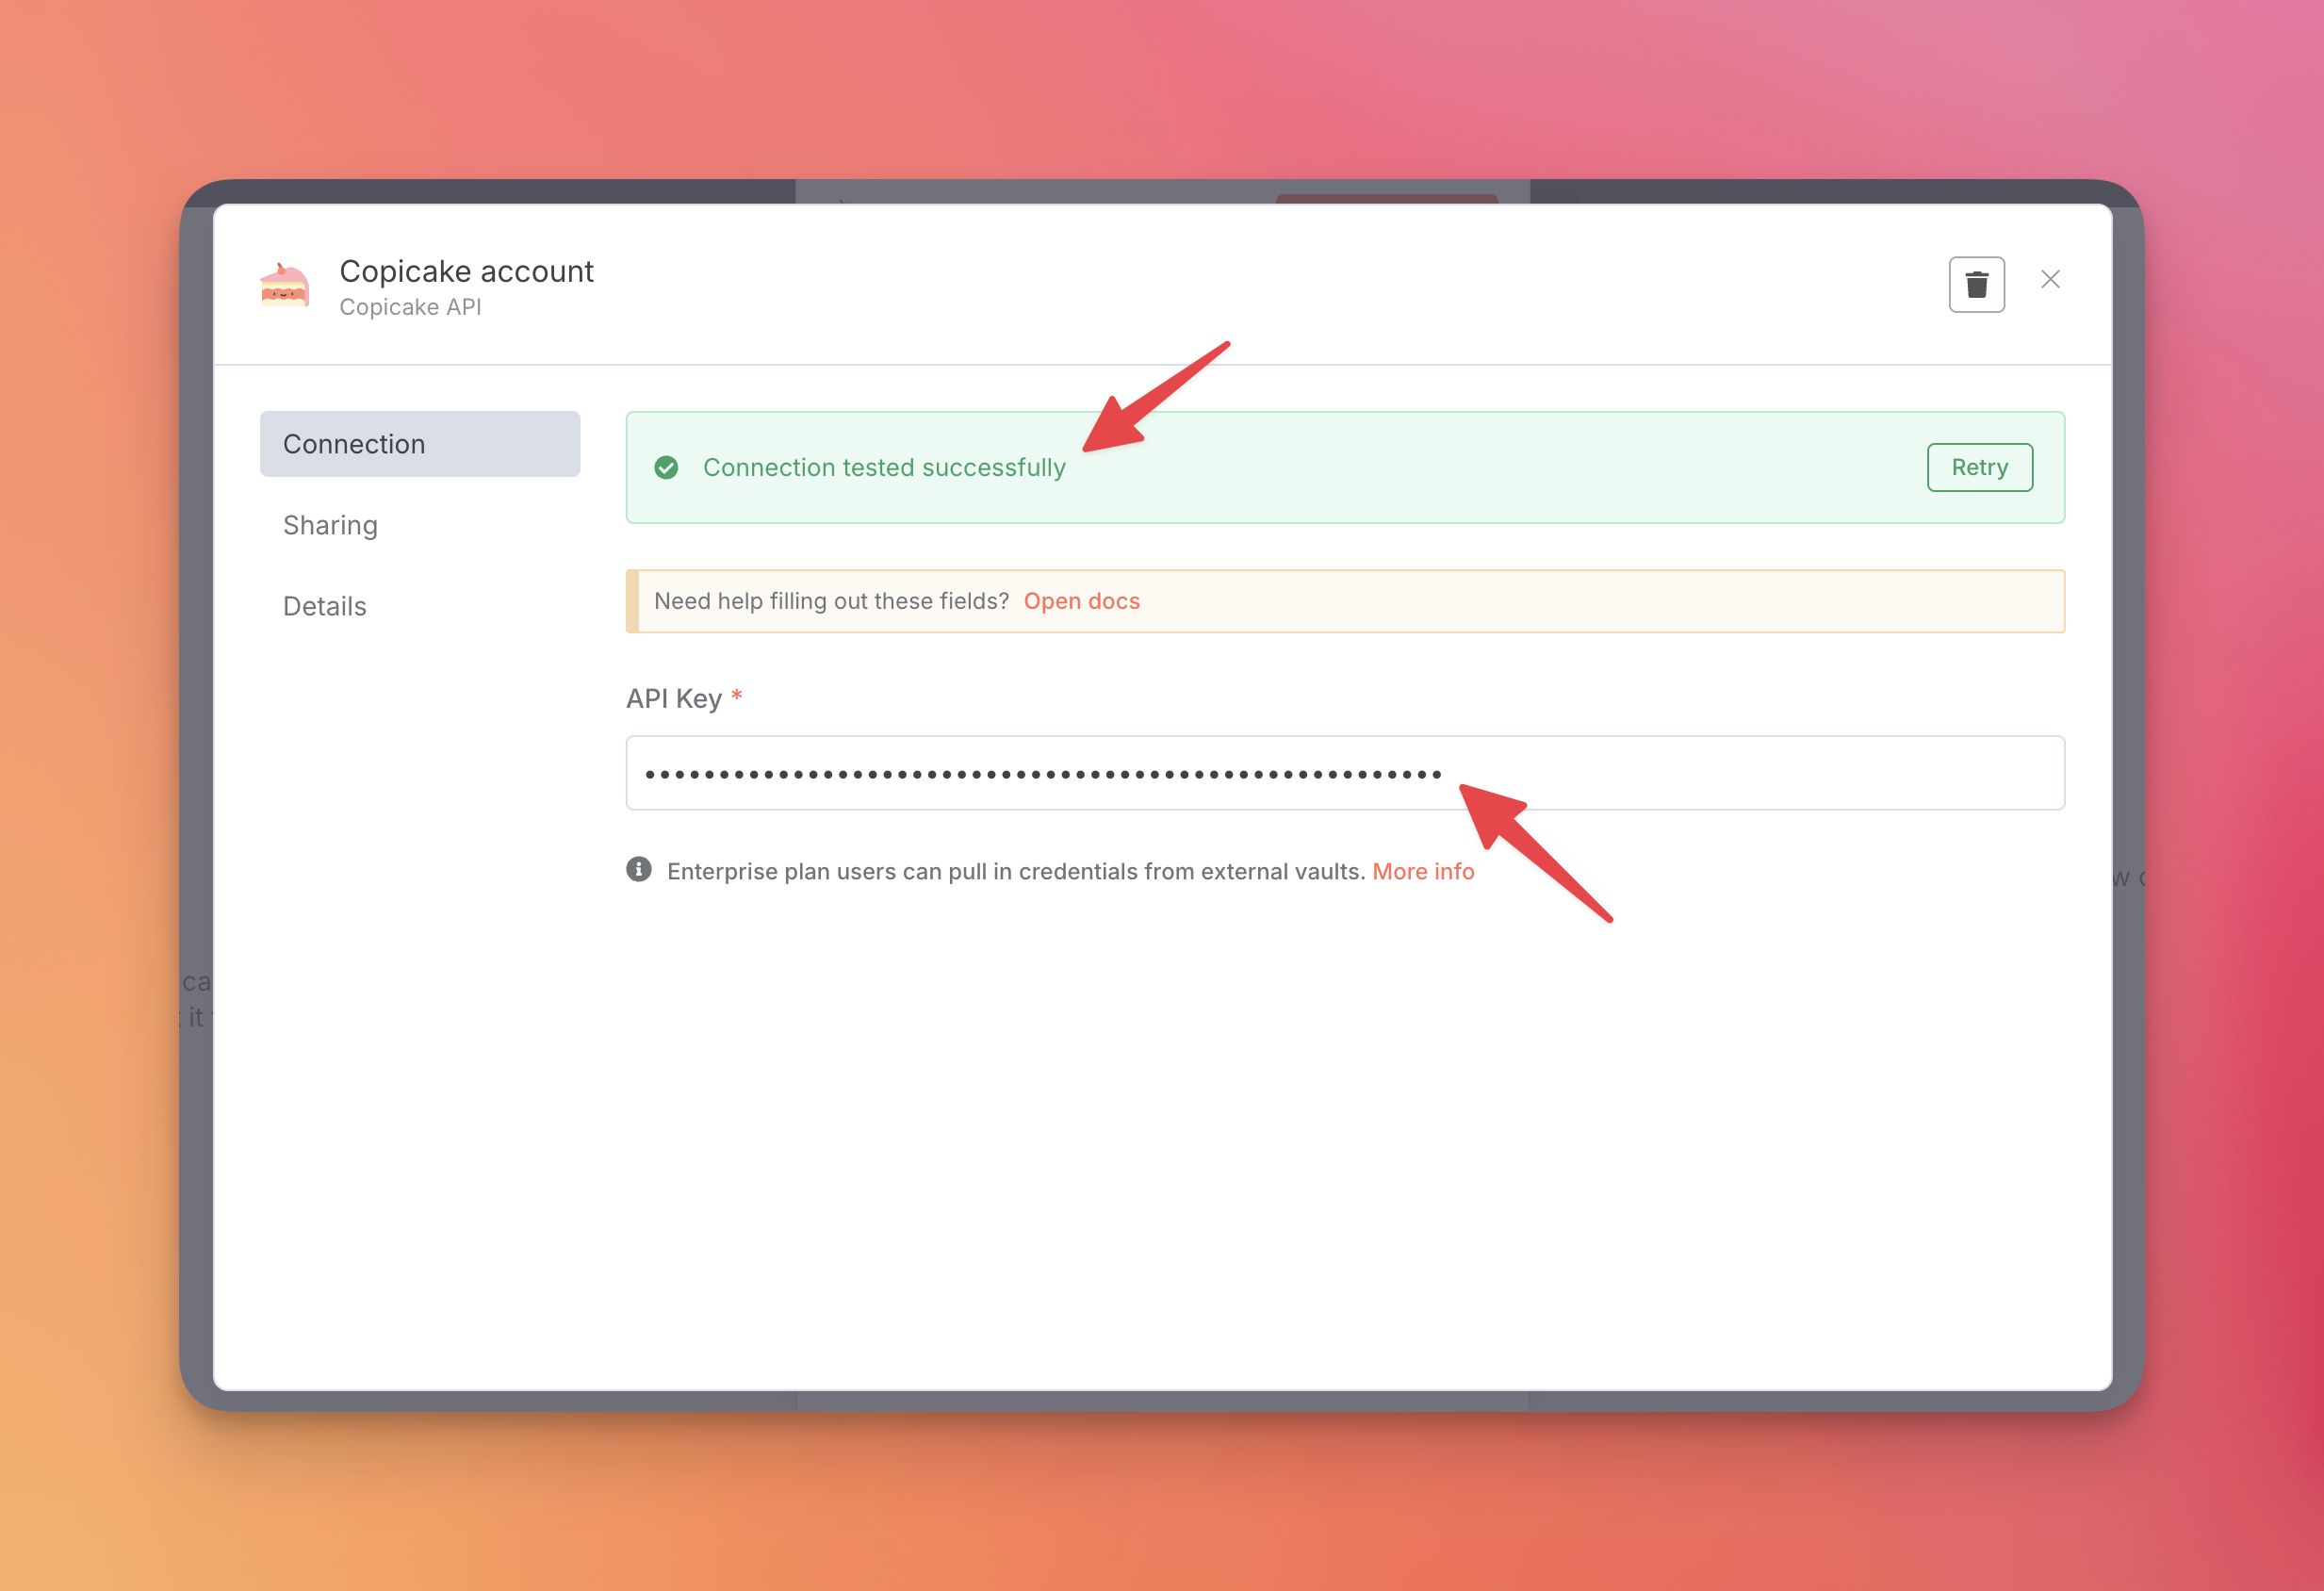
This will open a dialog where you can enter your Copicake API key. You can find your API key in your Copicake account settings. After pasting the key, the connection will be tested automatically.
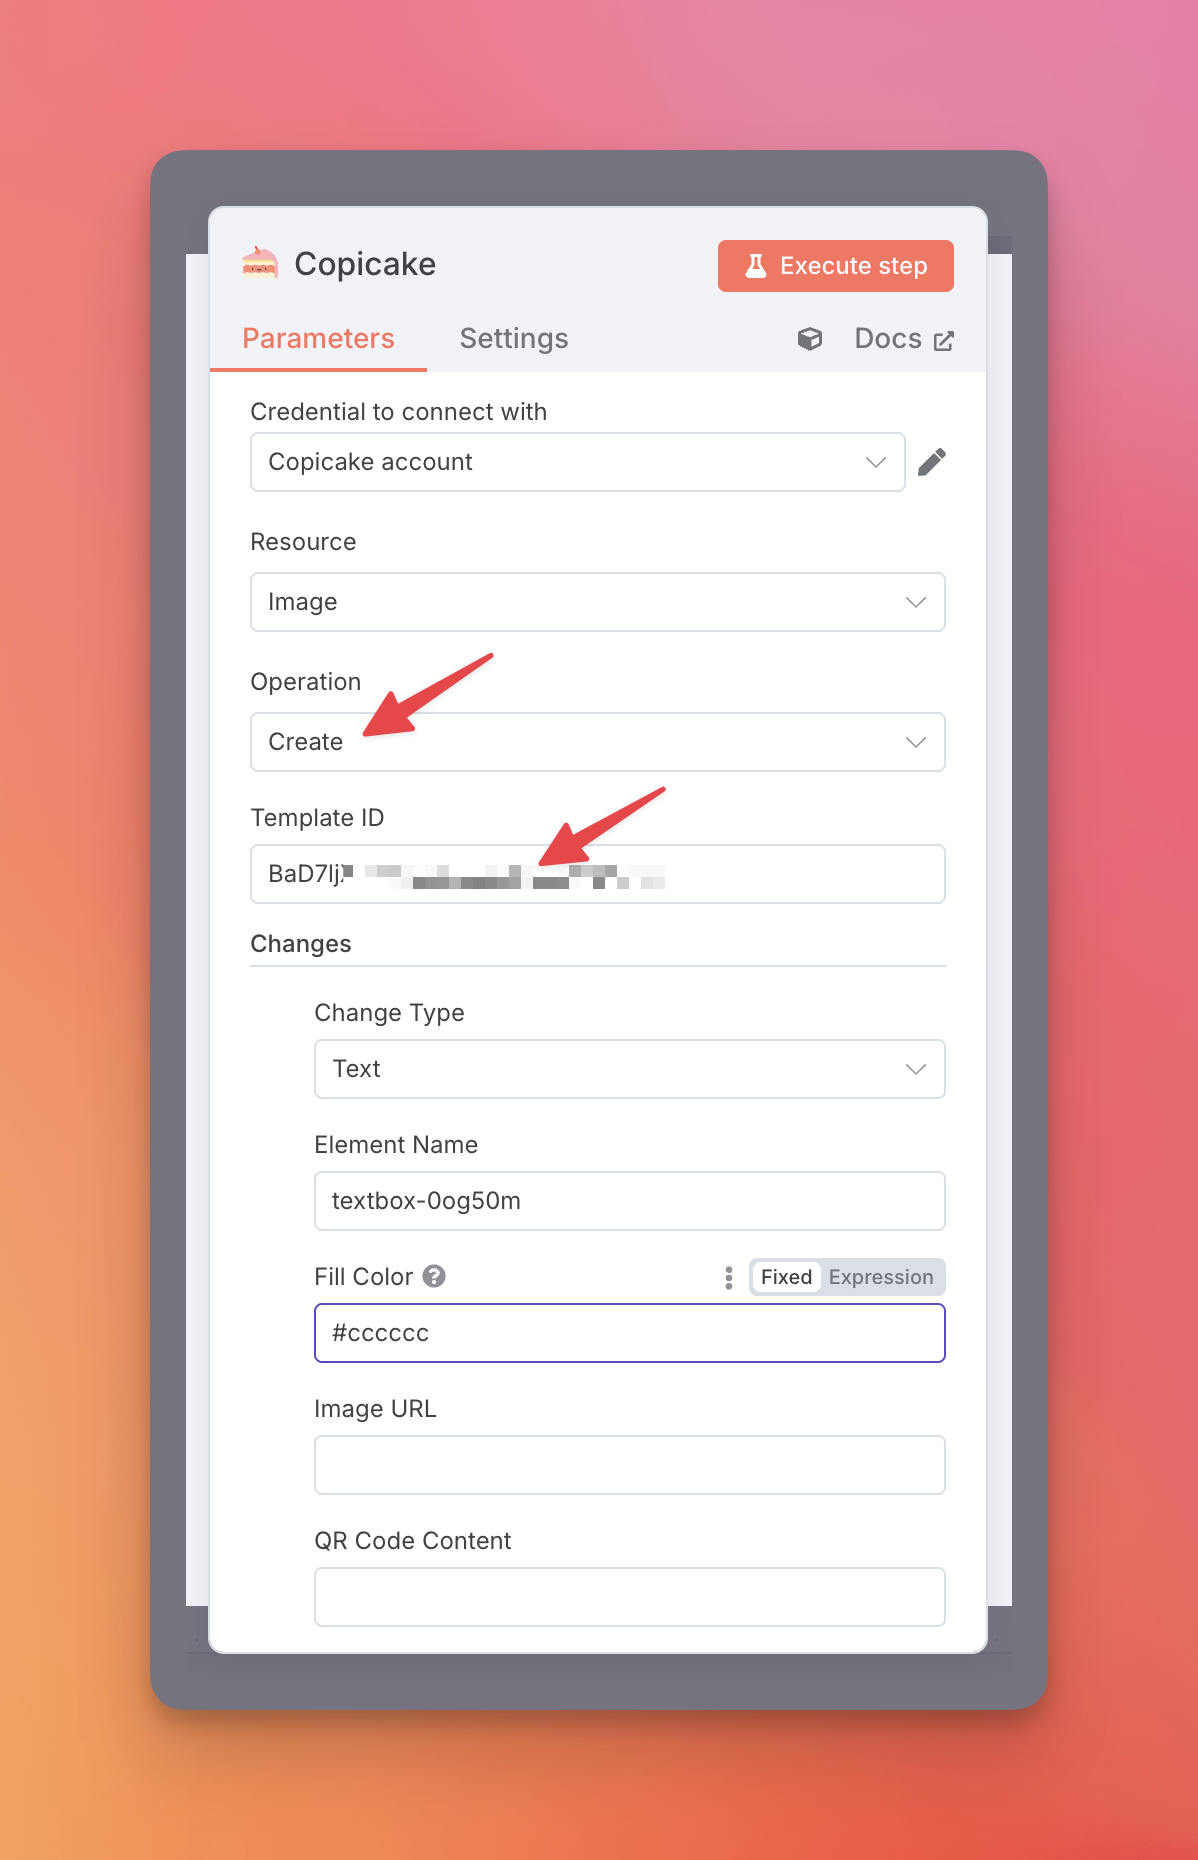
6. Set up the image generation
Now, you can configure the image generation. You'll need to provide a Template ID and can specify dynamic changes for elements in your template.
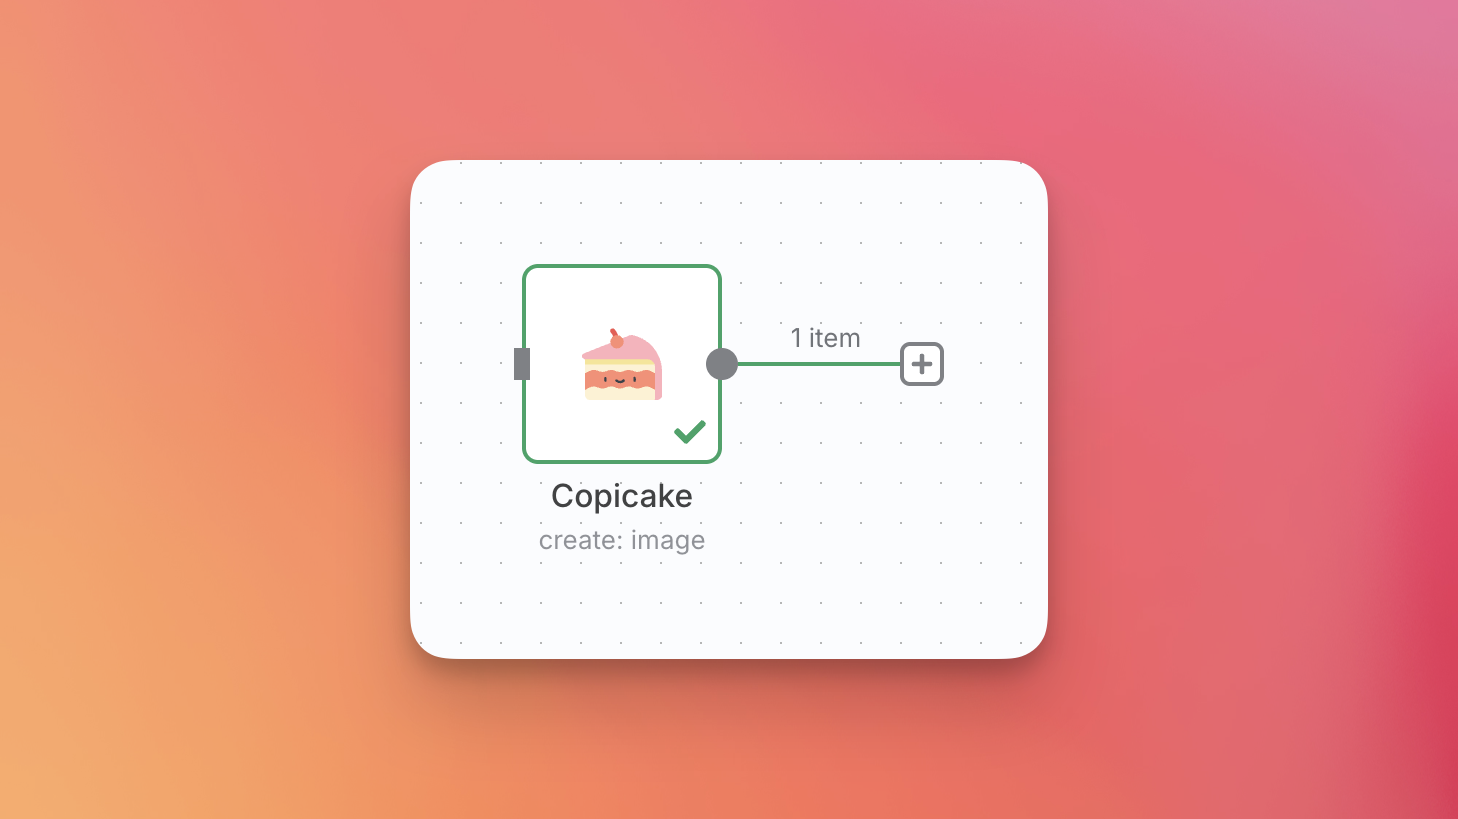
7. Run the workflow and see the result
Execute the step, and you'll see the Copicake node run successfully.
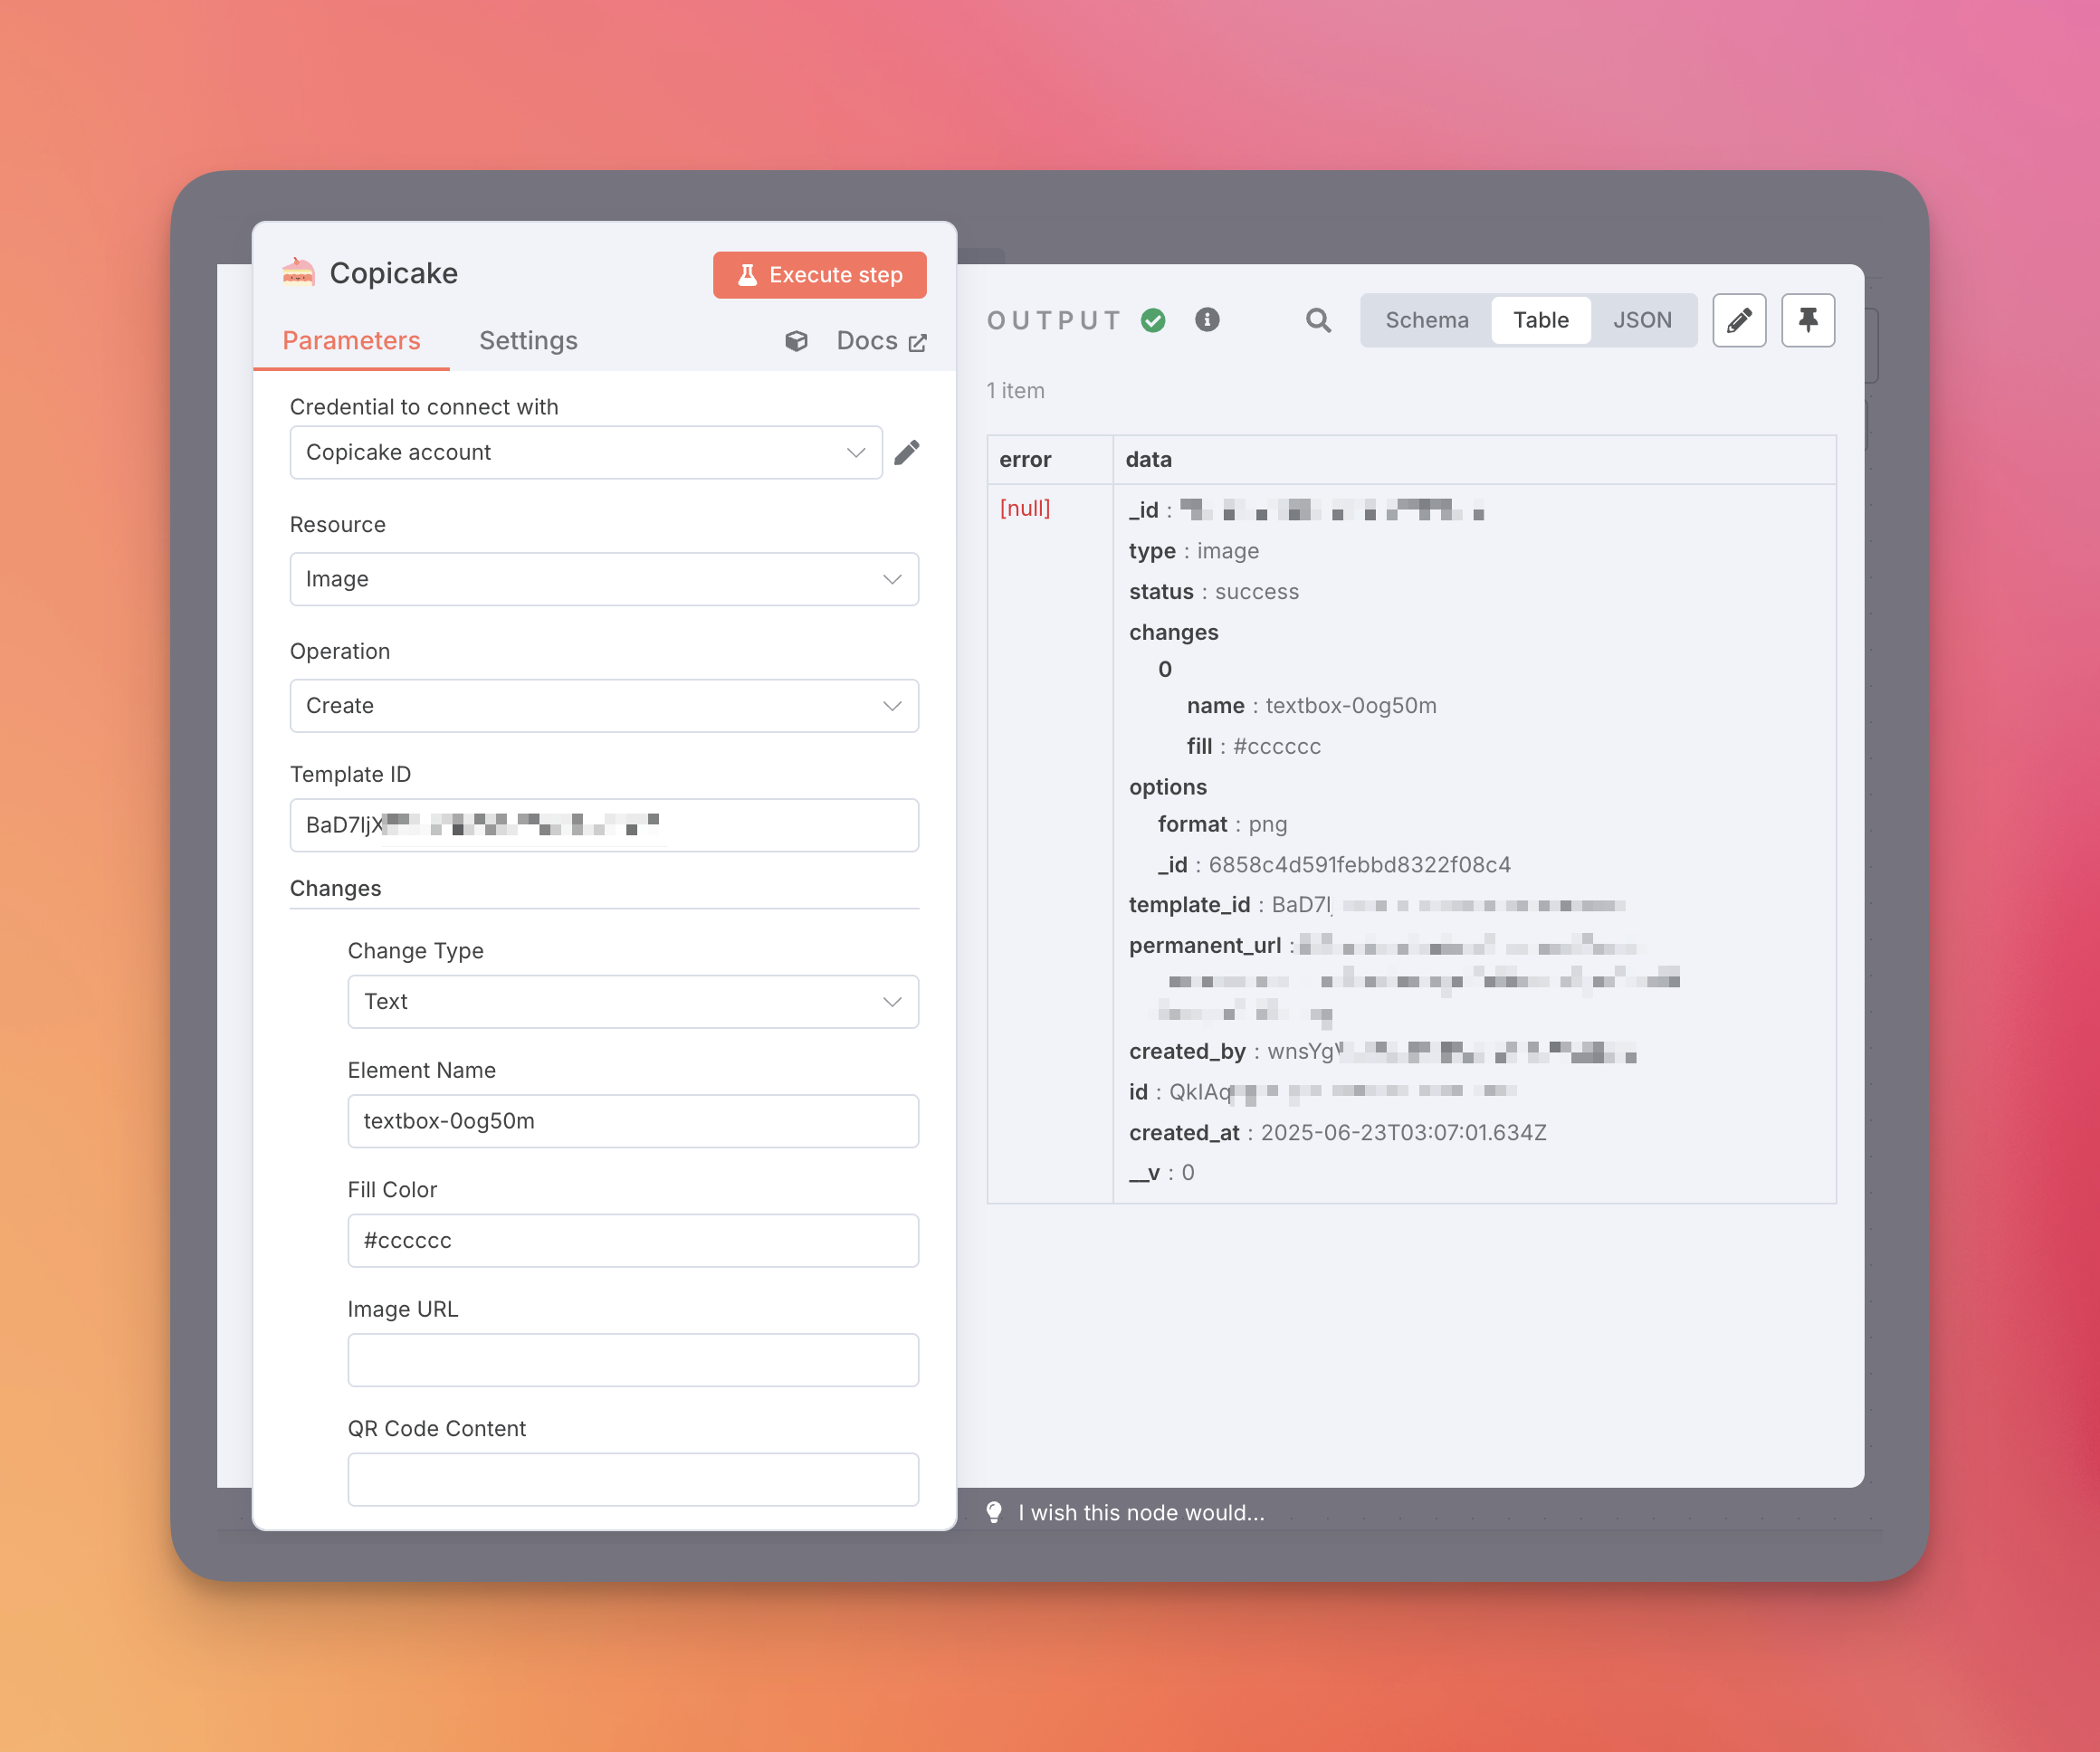
The output will contain the URL of the generated image and other useful data, which you can use in subsequent steps of your workflow.
And that's it! You're ready to automate your image creation with Copicake and n8n.
Last words
We hope this guide helps you get started with using Copicake in your n8n workflows. The possibilities for automation are endless - from generating social media graphics to creating dynamic email banners and more.
If you have any questions or need help setting up your workflow, don't hesitate to contact us. We're always happy to help!
Happy automating with Copicake and n8n! 🚀